I’m planning to swap in an ND2 engine into my ND1. If you’re not sure what I’m talking about here is a brief summary. The 2016-2018 Miata’s came with 155hp and are designated as ND1s. The 2019 to current Miata’s came with 181hp and are designated as ND2s. The higher power engine is more or less a direct swap with a few modifications. One of which is the throttle body (TB). The ND1 has a 55mm TB whereas the ND2 has a 60mm TB. But you don’t need to swap engines to use the bigger TB on your 155hp ND. Here is how I did it.
First off, why would someone want to do this? As I mentioned above, I’m planning a ND2 swap and in order to run the bigger TB on the ND1 you need to change the connector on the wiring harness. The ND2 TB, in addition to being bigger, also now uses a smaller connector but since it’s still a six-pin connector like the ND1 TB with the same pinouts the modification is very easy. However, I didn’t want to splice into my harness, instead I wanted to make an adapter harness.
I had a good reason for doing so. First off, I didn’t want to risk ruining the OEM wiring harness. It’s a very easy splice and connect modification but I still never want to hack up a factory harness if I can help it. Second, while I’m doing this as part of planning for an engine swap, there may be other ND1 owners that don’t want to go through the process of an engine swap but still want to make use of the bigger TB to go along with their other modifications and tunes. Especially since the opening on the intake manifold where the TB mounts is 60mm. An adapter harness would allow for a very quick plug and play solution.
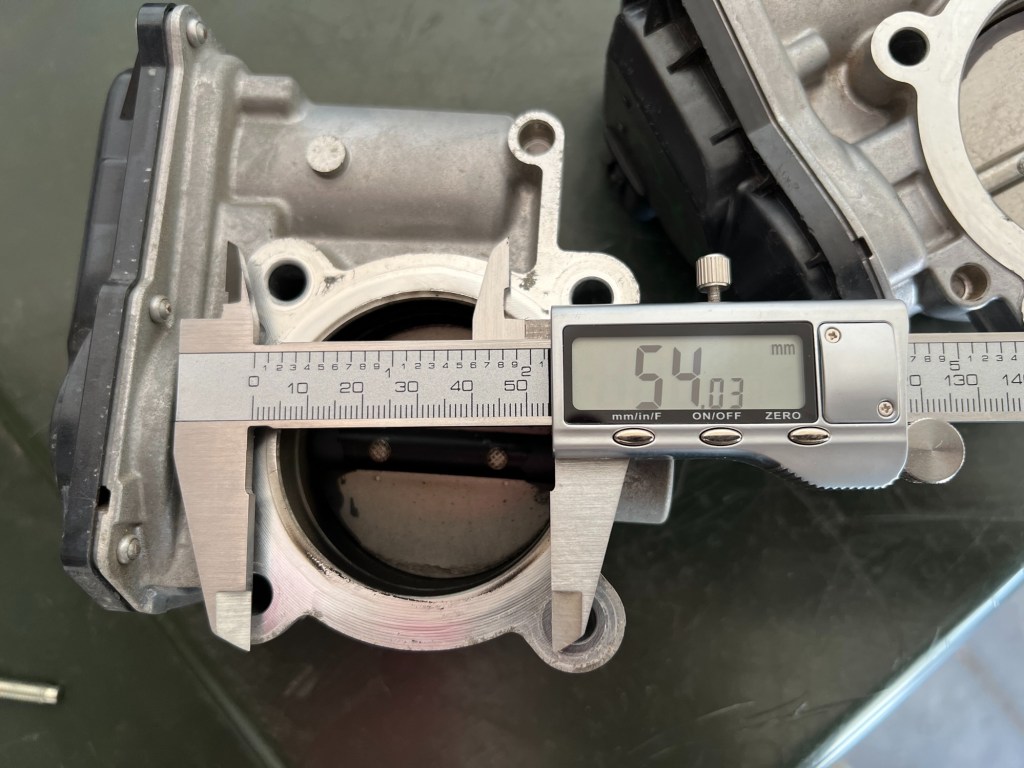
What’s interesting is that, while the ND2 TB is indeed bigger, the initial opening for it is nearly identical. The ND1 has a 58.9mm opening that tapers to just over 54mm whereas the ND2 has a 60mm opening that essentially stays the same, tapering to 59.59mm. Keep in mind this was the first time I’ve used a caliper to measure so while my measurement may be slightly askew the data is clear enough.

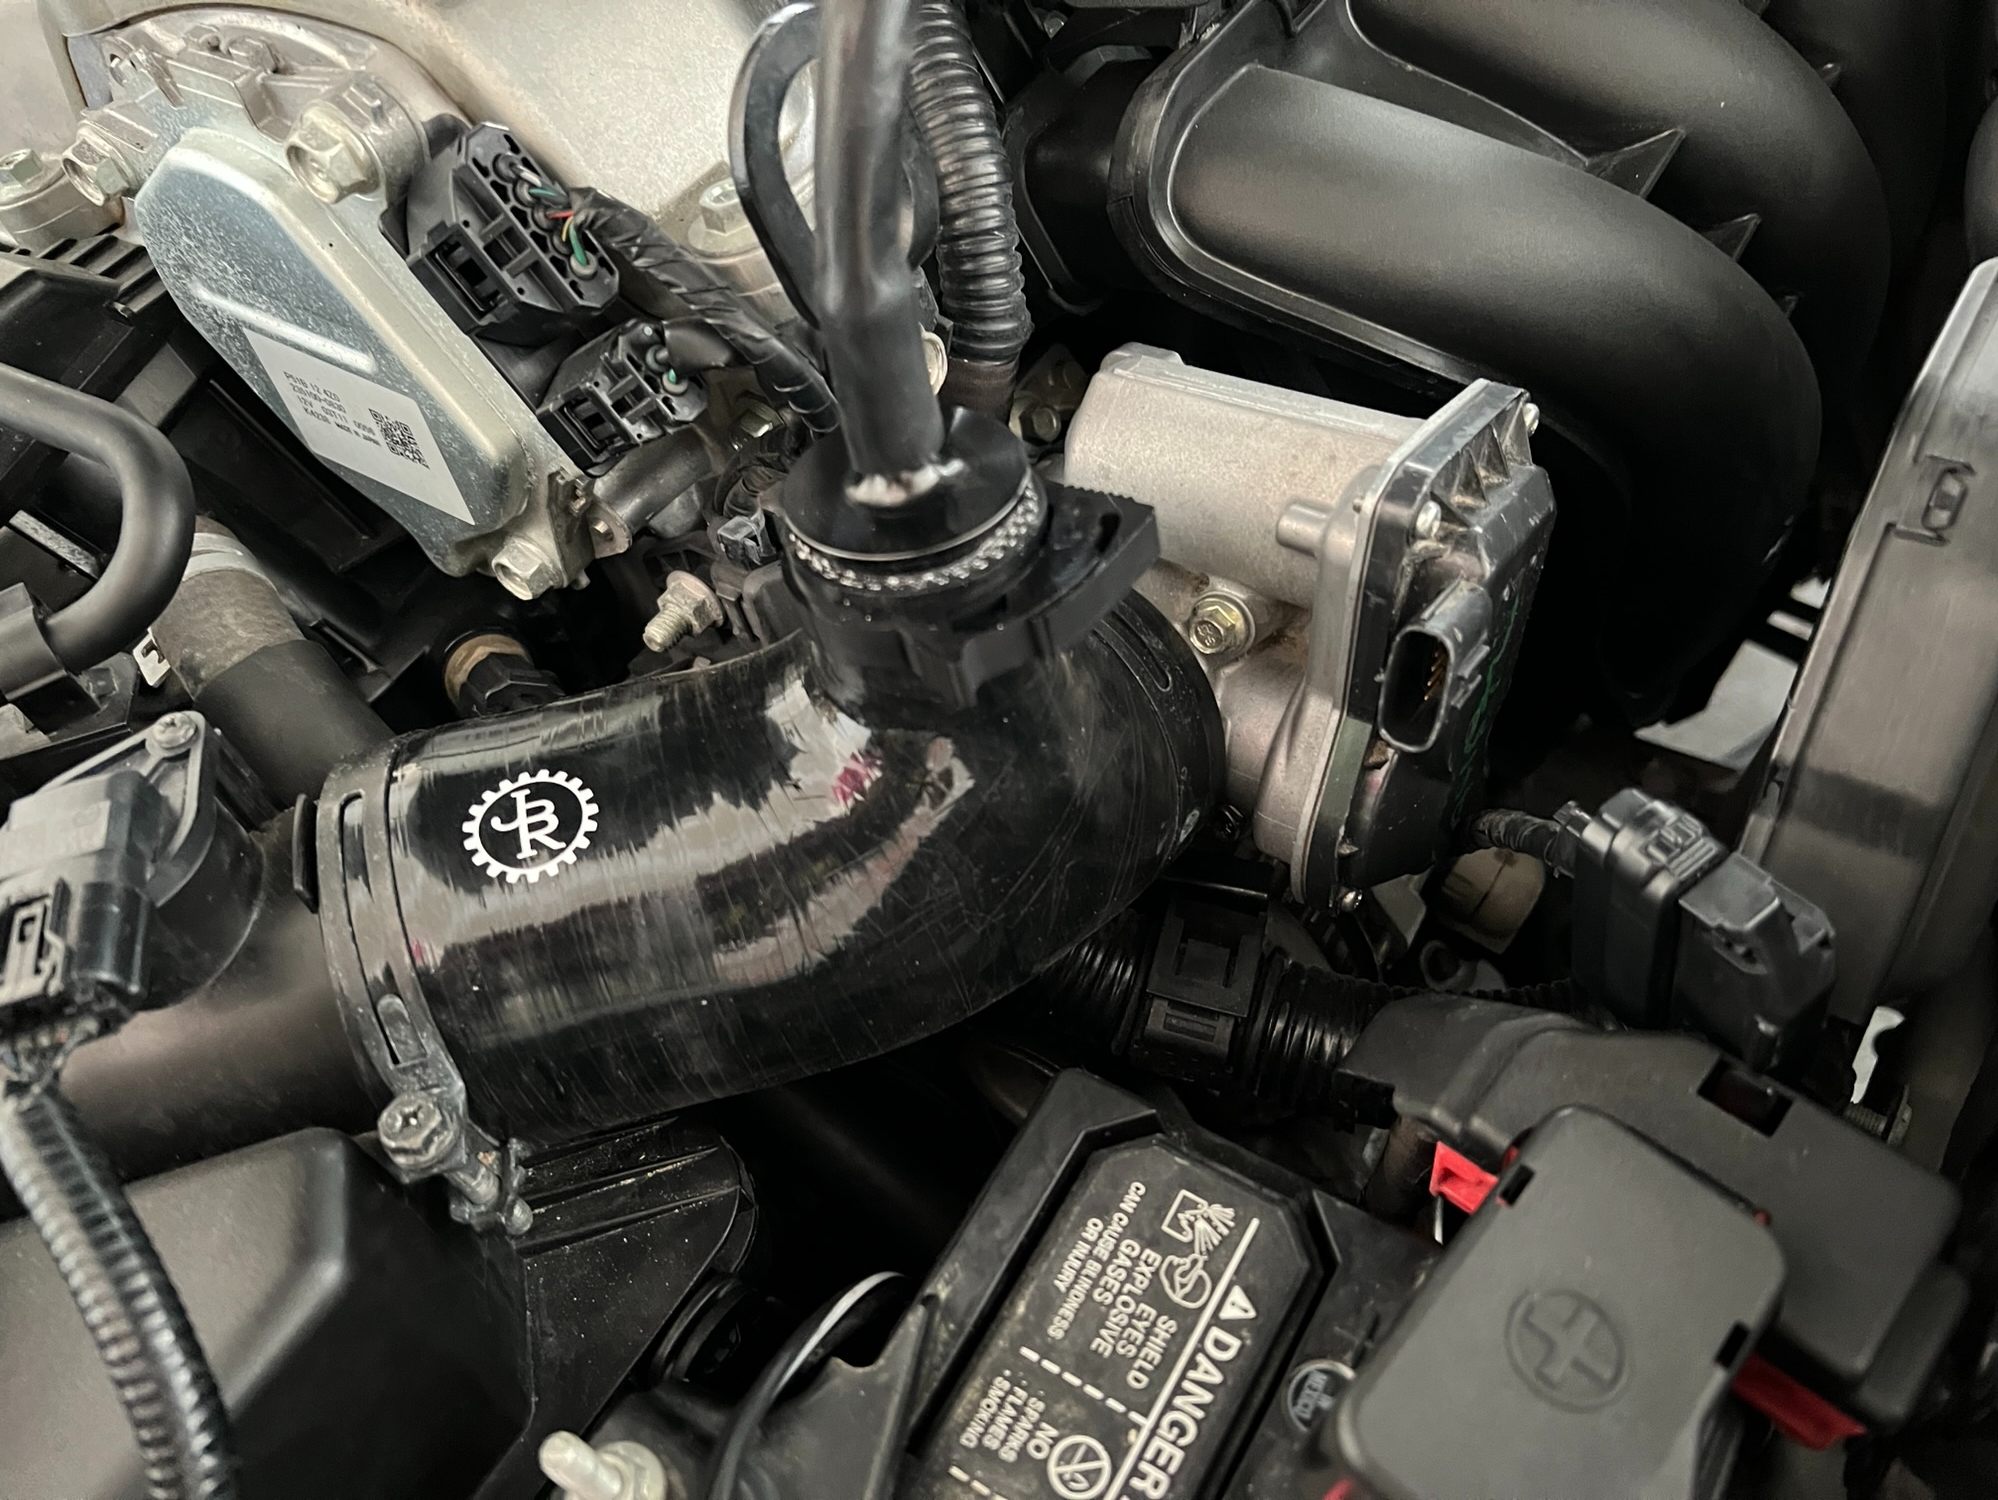
With my wiring harness, the process of swapping in the 60mm TB took less than 10 minutes. Before I continue, I want to address another option and why I didn’t go down that route. There is another way to install a 60mm TB on the ND1 using the 2.5L TB from a Mazda3 or Mazda6 of the same era that uses the same connector already on the ND1, but the mounting holes are different requiring you to drill them out to mount it. Also, the factory intake elbow does not fit on the 2.5L TB and since I am already running an aftermarket intake elbow, I didn’t want to give that one up since the ND2 TB, while being 5mm bigger than the ND1, has the same outside diameter of the ND1 TB allowing use of factory or factory size intake elbows.
So the ND2 TB mounts up to the ND1 intake manifold and uses the same intake elbow. Great, mechanically there is nothing to modify. Now let’s get to the wiring. In order to make my adapter harness I needed to get my hands on the OEM connector for the ND2 TB as well as the reverse connector for the ND1 wiring harness. This took a decent amount of searching but I was able to find them. First on Ali Express but since they would take ages to arrive, I started searching the part numbers I located on Ali Express and found them on Amazon as well. So I ordered those too. Links to the Amazon parts are at the bottom.
The parts arrived and since I was buying based off of pictures and not actual OEM part numbers, I immediately went out to the car to test them and luckily what I received were the right parts, they both clicked into to their respective counterparts. Now all I had to do was wire them up so I could form them into a harness. Now if I was just splicing an OEM ND2 connector onto the OEM ND1 harness I would just need to match wire colors and be on my way. However, the harness on the ND2 engine I was going to use only had a few connectors still left on it, unfortunately the TB was not one of them. So I needed to figure this out.
An hour or so of searching online told me that the connectors should be direct replacements. Meaning, I don’t have to worry about mixing up wires, as long as the connectors are in the same orientation such as both being clip side up. Its a direct 1 to 1 connection. So I hastily made a quick prototype connector, just twisting and taping the two connectors I had together. I fired the car up and….it worked. The car fired up, idled smooth and the throttle worked like it should. Success!


Knowing that my harness works, I then cut it down smaller, soldered the connections and covered the splices with heat shrink to make a more professional looking harness for my final prototype. Since I still have connectors on the way from overseas, when they get here I’m going to make my final design which will be a harness with no splicing, just pinned connections on both ends. Even though my current harness is working just fine, I’d prefer it have no splicing.

As I’ve said a few times the project was started to aid in my ND2 swap but until I get that done I’m going to keep the ND2 TB in my car. I did notice slightly better throttle response with it and a forum member who tested the 2.5l TB on their car dyno’d a 0.9WHP increase on factory tune. That’s barely anything but it’s not nothing. May as well run it while I wait to swap engines. Plus my Fab9 tune may make better use of it. Either way the car runs great and when I do my swap I’ll know that this part of the project is done.
Here are the two parts I ordered from Amazon to make my harness:
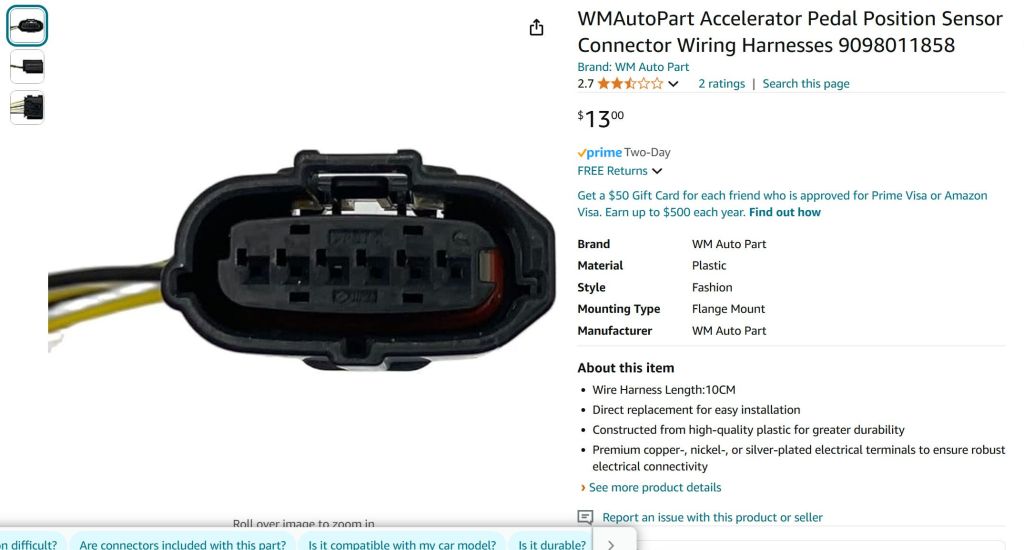
The reverse connector to plug into the ND1 Harness <- Link
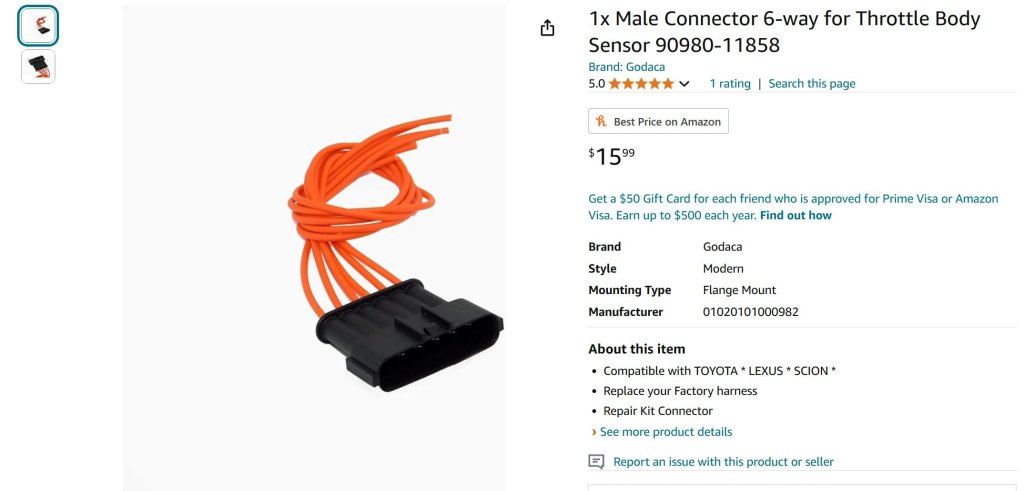
The connector that plugs into the ND2 Throttle Body <- Link